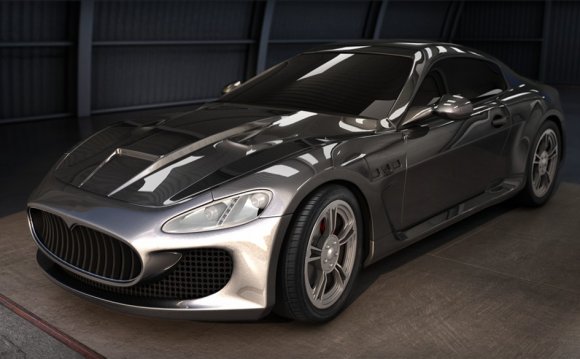
 Automotive modeling can be extremely challenging, but the results can be just as rewarding as the challenges you’ll overcome to reach your modeling goals. Your model could be found in anything from games and movies to TV and more. Who wouldn’t want to create their favorite sports car or a […]
Automotive modeling can be extremely challenging, but the results can be just as rewarding as the challenges you’ll overcome to reach your modeling goals. Your model could be found in anything from games and movies to TV and more. Who wouldn’t want to create their favorite sports car or a maybe a brand new concept vehicle for a futuristic universe?
Whether you’re working on recreating an actual vehicle or working from a unique concept, it’s up to talented modelers like yourself to sell the realism of the model and do so quickly and efficiently. So when you’re tackling your next masterpiece try implementing some of these tips in your workflow to help speed up the process.
Start off simple
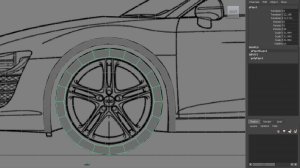
There’s no need to over-complicate your model right away by trying too much too soon. Instead, find places on your vehicle that can be modeled with very simple primitive shapes before worrying about the little details. For example, wheel wells can be a great place to start because they can be modeled with a simple shape.
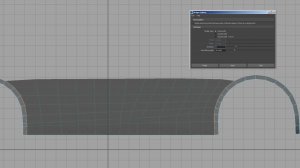
Block out shapes with an edge modeling technique
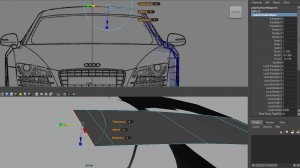
An edge modeling technique allows you to block out those oddly-shaped pieces that might be tough to create from simple primitives by allowing you to extrude out pieces of your car piece by piece. This technique is great for automotive modeling because cars are made up of a lot of curved shapes that can be quickly traced with an edge modeling technique. Once your shape is blocked out, you’ll have a great starting point for adding details.
Think outside the cube
 Since NURBS (or splines, depending on what your preferred 3D program is) can achieve a much smoother shape than polygons, let NURBS do their work by using them for the pieces of your car that lend themselves to them. For example, the windows of your car are going to be smooth surfaces that most likely have a single shader on it and probably won’t even need UVs, so they’ll be a perfect fit for NURBS.
Use NURBS and polygons together
Regardless of what your end model needs to be, take advantage of the wide range of NURBS and polygonal modeling tools you have available regardless of the type of geometry they create. Combining the two you can really help speed up your workflow and you can always convert to your final geometry type later on if you really need to.
Bridge pieces together
The bridge tool is huge time-saver for connecting pieces together and at the same time creating large chunks of geometry between those pieces very fast! An area you could try this out is between the two wheel wells. By bridging them together you can quickly create the entire side panel for your vehicle in a matter of seconds so you can focus your time on making it look right instead of spending it on just creating the initial geometry.
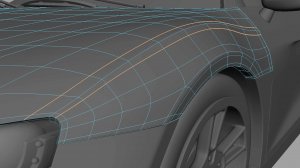
Crease only as much as you need to
When it comes to automotive modeling, creasing the right lines can really make or break the realism of your model. It can also be a quick way to add way too much resolution that isn’t really needed. Instead, try adding a single edge loop on either side of an existing edge. Move those surrounding edge loops closer to the original edge to increase the effectiveness of your crease or move the loops further away from the original edge to decrease the effectiveness.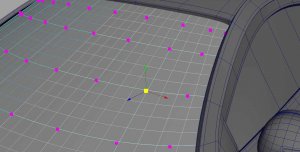 In most cases, these two edges should be plenty to sell the crease but even if you need to add more you’ll know its actually needed instead of adding edge loops in places that will really have no benefit to your model.
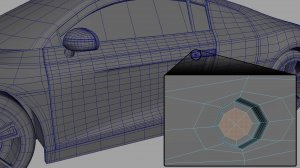
Punch clean holes in your model
Adding holes to your hard surfaces without affecting the surrounding geometry is a common challenge to overcome with automotive modeling. A great way to do this is by applying a chamfer to the nearest vertex to where you need the hole. This will create a new polygon that you can extrude inward to get your hole. Add in some resolution to crease the hole and you’re done!
Not all ngons are worth your time
The reason you typically stay away from ngons is when your model will be deforming or if your model will be exported to something like a game engine. Unlike a character, automotive models don’t normally need to be nearly as flexible as some other models may need to be. And if you’re not going to be exporting your car into a game engine if you come across ngons, before investing the time to quadrangulate them try running some quick tests to see if removing them would be time well-spent. For example, try doing a smooth preview or a test render.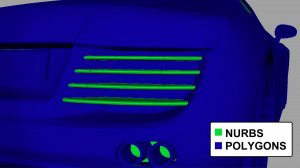 If you’re not seeing any negative effects then there’s no reason to lose any more precious time over trying to fix what isn’t broken!
Think ahead
You don’t always need to make every piece a separate object, but not everything in your automotive model should be faked. For example, is the door going to need to be animated? Then take the time now to make separate it from the surrounding pieces. Even though you’re not animating the car, making sure you know the purpose of each piece now can save you from having to tweak it later once the animation team kicks it back to you for a door that is actually attached to the rest of the car.
Smooth your ride
Many 3D applications can let you do a smooth preview without actually having to permanently apply a smoothing operation, so take advantage of that to check your progress often by previewing how your car looks with a smooth. This way you can focus your time on the parts of the model that need more work and leave those areas that don’t. As an added bonus, you’ll get to ease your mind by double-checking on any ngons you might have to make sure your tweaking hasn’t made them start causing issues.
So now you’ve heard some of our favorite tips for automotive modeling. If you can’t wait to get more, check out the Automotive Modeling in Maya course to learn some more great tips and tricks. Or if you’ve got some of your own automotive modeling tips and tricks that you want to share with is, swing over to our community forum and let us know!
RELATED VIDEO


Share this Post
latest post
-
 Car Design companies July 24, 2026
 -
 Auto Designer salary July 4, 2026
 -
 Car design.com June 14, 2026
 -
 Automotive power supply Design May 25, 2026
 -
 Become a car Designer May 5, 2026
 -
 Car Design software online April 15, 2026
 -
 Car Designs March 26, 2026
 -
 Automobile, Vehicle March 6, 2026
 -
 Automotive Shop Design February 14, 2026